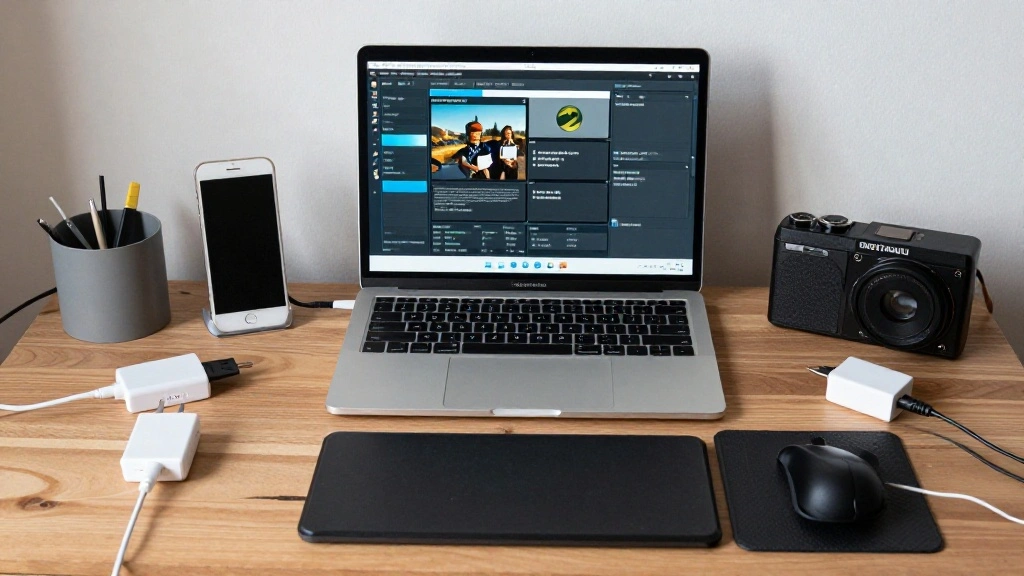
Have you ever found yourself scrambling to find an available outlet for your devices while working at your desk? If so, you’re not alone. In our increasingly tech-driven world, having a well-organized charging station is not just a convenience; it’s a necessity. With multiple devices needing charged at once, the clutter can become overwhelming and distracting.
This guide will help you create a dedicated charging station for your desk devices, ensuring you have a tidy workspace and easy access to power. By following these steps, you’ll learn how to set up a charging station that enhances your productivity and keeps your devices powered up.
In this article, you will learn about the materials needed, the best practices for organization, and tips for maintaining your charging station. Difficulty Level: beginner. Estimated Time: 1-2 hours. Let’s get started!
TL;DR Summary
- Gather materials including power strips, chargers, and organizers.
- Choose the best location for your charging station.
- Organize cables and devices for easy access.
- Regularly maintain and clean your station to keep it functional.
TL;DR Summary
Editor’s Choice

Alex Tech 10ft – 1/2 inch Cord Protector Wire Loom Tubing Cable Sleeve S…

USB C Charger Block,65W 6-Port USBC Charging Block,Wall Charger iPhone C…

LADSTAG Pen Organizer with Phone Stand,Black Vegan Leather Desk Organize…
Prerequisites/Materials Needed
- Power Strip: 1 unit, at least 6 outlets
- Device Chargers: 1 for each device (laptop, tablet, phone)
- Cable Management Solutions: Cable clips or sleeves
- Storage Organizer: Small bins or trays
- Cleaning Supplies: Soft cloth and screen cleaner
Prerequisites/Materials Needed
Editor’s Choice

6Ft Power Strip Surge Protector – Yintar Extension Cord with 6 AC Outlet…

Anker Desktop Charger, 9-in-1 Power Strip with 300J Surge Protector, 5ft…

MVYC 120PCS 6 Inch Cable Ties Reusable Multi-Purpose Wire Ties Cord Orga…
Skill Level & Time Estimate
Skill Level: beginner
Total Time Estimate: 1-2 hours
Breakdown: Gathering materials (15-30 minutes), Setting up (30-60 minutes), Organizing and Maintenance (15-30 minutes).
Skill Level & Time Estimate
Editor’s Choice

Cable Management Under Desk, 【Up to 15 Cord】【Enhanced Wire Holder�…

Kakyanill 100W Charging Station, 6 AC Outlets 8 USB Power Strip with 200…
Step 1: Choose a Suitable Location

Begin by selecting a location for your charging station that is easily accessible and provides enough space for all your devices. Follow these steps:
- Identify a spot on your desk or nearby that can accommodate a power strip and devices.
- Ensure the location is near an electrical outlet.
- Consider visibility and accessibility – you want to reach your devices easily.
Pro Tip: If possible, choose a corner of your desk to help keep the area tidy and free from clutter.
Why this matters: A well-chosen location lays the foundation for an efficient charging station, preventing you from having to search for devices or cords later.
Time Estimate: 10 minutes.
Step 1: Choose a Suitable Location
Editor’s Choice

Gitryin 12-in-1 Desktop Charging Station with 3 Retractable Type-C Charg…

6Ft Power Strip Surge Protector – Yintar Extension Cord with 6 AC Outlet…

Cable Management Box, Handmade Rattan Cable Organizer with 2 Open Slots,…
Step 2: Gather All Necessary Materials
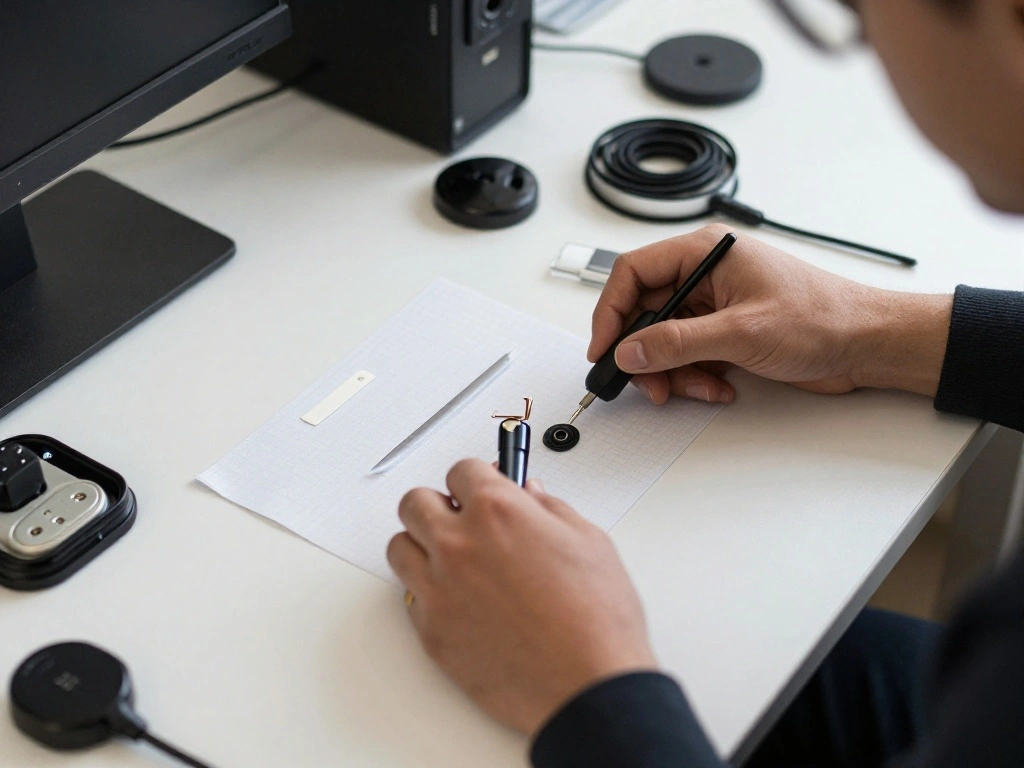
Next, gather all the materials listed in the prerequisites. This will ensure you have everything on hand for a smooth setup. Follow these sub-steps:
- Collect your power strip and check that it functions properly.
- Gather all device chargers and ensure they are compatible with your devices.
- Have your cable management solutions ready for use.
- Prepare your storage organizer for keeping devices in place.
Warning: Double-check that your power strip is not overloaded to prevent tripping breakers or causing electrical issues.
Why this matters: Having everything ready will streamline the process and prevent interruptions during setup.
Time Estimate: 15 minutes.
Step 2: Gather All Necessary Materials
Editor’s Choice

14 Slots Universal Multi Device Organizer Dock Space-Saving Acrylic Clea…
Step 3: Set Up the Power Strip
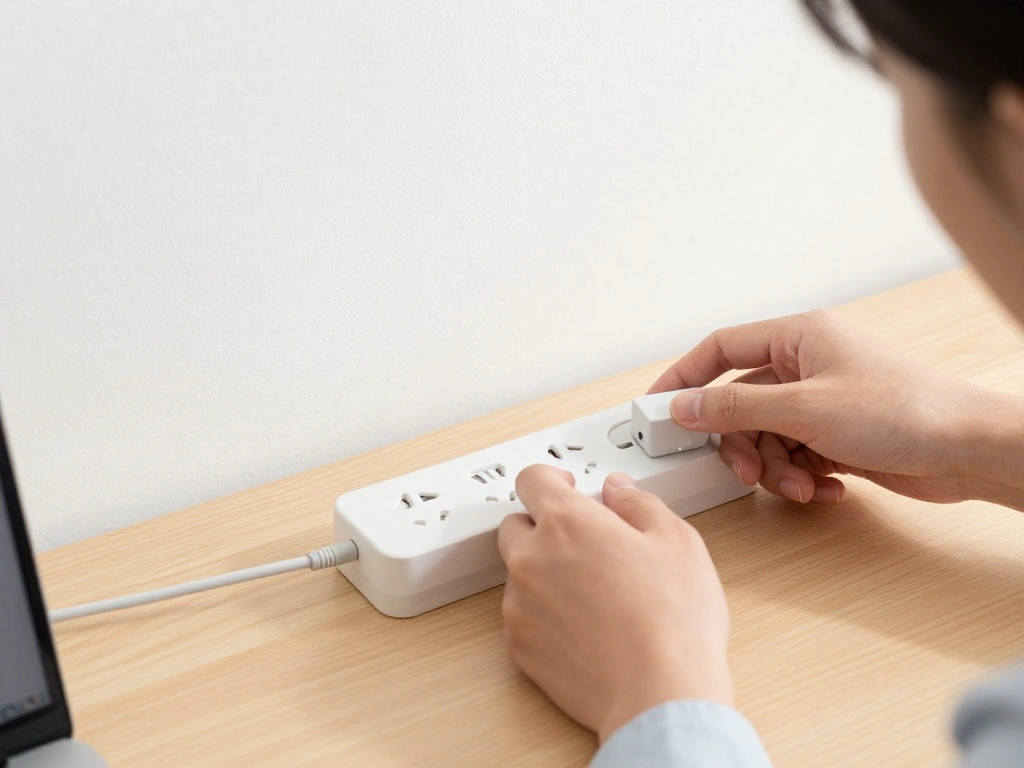
Now, it’s time to set up your power strip. This will be the core of your charging station. Do the following:
- Securely plug your power strip into the wall outlet.
- Position it in the chosen location, ensuring it’s stable.
- If your power strip has a surge protector, ensure it is activated.
Pro Tip: Use adhesive strips or Velcro to attach the power strip to the underside of your desk for added stability and to save space.
Why this matters: A secure power strip prevents accidental disconnections and keeps your charging station functional and organized.
Time Estimate: 10 minutes.
Step 3: Set Up the Power Strip
Editor’s Choice

Belkin 12-Outlet Surge Protector Power Strip w/ 12 AC Outlets & 8ft Flat…
Art3d 16 Sets Hook and Loop Tape Sticky Back,1 in.x 4 in. Double-Sided C…
Step 4: Connect Your Chargers
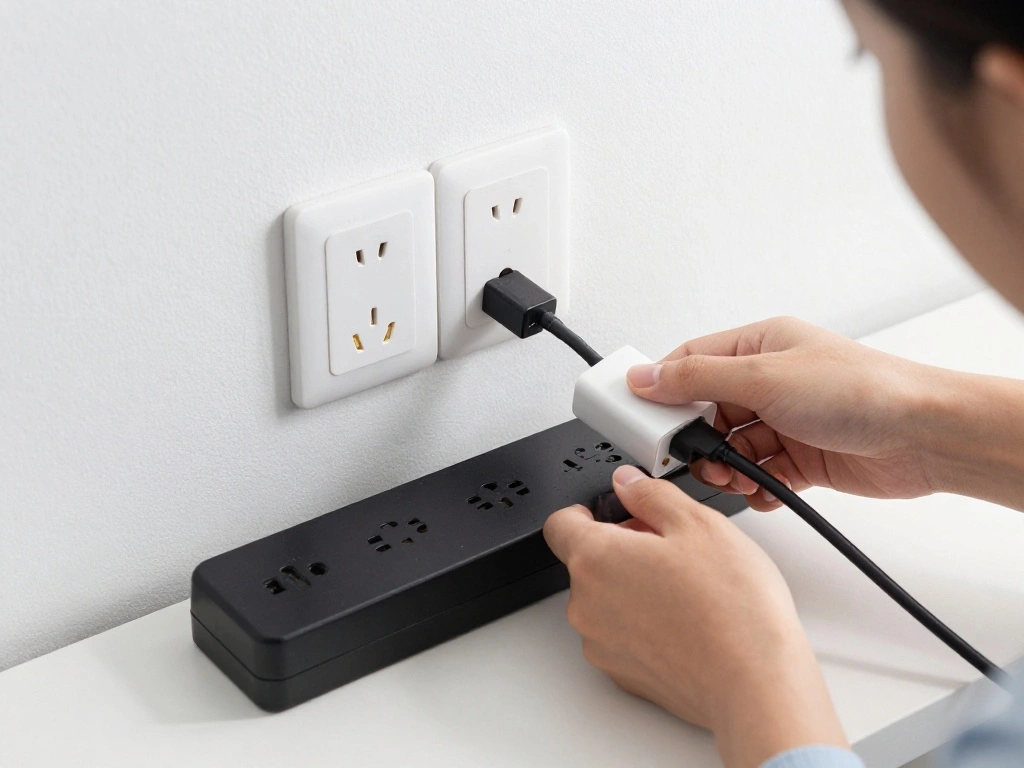
With the power strip ready, it’s time to connect your device chargers. This will allow you to start charging your devices immediately. Follow these steps:
- Plug each charger into the power strip, ensuring they are spaced out to avoid clutter.
- Label chargers if necessary to identify which belongs to which device.
- Ensure the chargers are compatible with your devices to avoid damage.
Warning: Avoid overloading the power strip; check the wattage limits for safe usage.
Why this matters: Properly connecting chargers not only keeps devices powered but also prevents electrical hazards.
Time Estimate: 15 minutes.
Step 4: Connect Your Chargers
Editor’s Choice

Nelko Label Maker Machine with Tape, P21 Bluetooth Label Printer, Wirele…
6Ft Power Strip Surge Protector – Yintar Extension Cord with 6 AC Outlet…
Step 5: Organize Cables Neatly

Next, organize your cables to keep your workspace tidy and manageable. This step is crucial for preventing tangles and wear on cables. Do the following:
- Use cable clips or sleeves to group cables together.
- Route cables along the desk edges or underneath to reduce visibility.
- Label cables if necessary for quick identification.
Pro Tip: Consider using color-coded labels to differentiate between device cables easily.
Why this matters: A tidy cable setup improves your workspace aesthetics and makes it easier to find and use your devices.
Time Estimate: 20 minutes.
Step 5: Organize Cables Neatly
Editor’s Choice

Trilancer Cable Cord Labels Large Size, for Organizing Wires and Identif…
Step 6: Designate Spaces for Devices

Now that your cables are organized, designate specific spaces for each device to ensure easy access. Follow these steps:
- Use your storage organizer to create sections for each device.
- Place devices in their designated spots, ensuring they are stable and secure.
- Keep frequently used devices at the front for easy access.
Warning: Avoid placing devices in areas where they might be knocked over easily.
Why this matters: Clearly designated spaces prevent loss and confusion, making your charging station more efficient.
Time Estimate: 15 minutes.
Step 6: Designate Spaces for Devices
Editor’s Choice

UGREEN Tablet Stand Holder Adjustable Portable Desktop Dock Office Compa…

Flezoo Cord Holder Cable Holder, 12PCS Black Adhesive Cable Clips Cord O…
Step 7: Regular Maintenance Checks

To keep your charging station functional, establish a routine maintenance check. This will help prolong the life of your devices and chargers. Here’s how:
- Weekly, check the condition of cables and chargers for wear and tear.
- Clean the area using a soft cloth and screen cleaner.
- Reorganize cables and devices if needed to maintain order.
Pro Tip: Set a reminder on your calendar to perform these checks regularly.
Why this matters: Regular maintenance keeps your station functional and prevents unnecessary issues, ensuring your devices remain charged and ready.
Time Estimate: 10 minutes per week.
Step 7: Regular Maintenance Checks
Editor’s Choice
Alex Tech 10ft – 1/2 inch Cord Protector Wire Loom Tubing Cable Sleeve S…

EVEO Screen Cleaner Spray – Large Screen Cleaner Bottle – TV Screen Clea…
Anker Desktop Charger, 9-in-1 Power Strip with 300J Surge Protector, 5ft…
Step 8: Improve with Extra Features
To enhance your charging station further, consider adding extra features that can improve functionality. Here are some options:
- Incorporate a charging dock for easier device placement.
- Add a small lamp for better visibility when connecting devices.
- Consider a wireless charging pad for compatible devices.
Pro Tip: Look for multi-port chargers to reduce the number of plugs needed.
Why this matters: Extra features can improve convenience and make your charging station more user-friendly.
Time Estimate: 20 minutes.
Step 8: Improve with Extra Features
Editor’s Choice

10-Port USB Wall Charger Station with Rapid Charging Auto Detect Technol…

Amazon Basics Wireless Charger, 15W Qi Certified Wireless Charging Pad w…

Dicoool Touch Bedside Table Lamp with USB – 3 Way Dimmable Wood Lamp for…
Step 9: Personalize Your Charging Station
Finally, take the time to personalize your charging station to make it feel more like your own. Here’s how:
- Add decorative elements like a picture frame or plant.
- Choose a color scheme that matches your workspace.
- Incorporate personal touches that inspire you while working.
Pro Tip: Keep personalization minimal to avoid clutter and maintain functionality.
Why this matters: A personalized space can enhance your motivation and make your workspace more enjoyable.
Time Estimate: 15 minutes.
Step 9: Personalize Your Charging Station
Editor’s Choice

WARM&LOVE 4 Picture Frame, 4×6 Four Folding Hinged Photo Frames, Rustic …

Der Rose Set of 6 Succulents Plants Artificial in Pots Small Fake Plants…
Pro Tips
- Tip 1: Use a USB hub for devices that charge via USB to reduce clutter.
- Tip 2: Consider using labeled power strips to identify which devices belong to which area.
- Tip 3: Regularly rotate devices to avoid battery issues from prolonged charging.
- Tip 4: Use a surge protector to protect your devices from power surges.
- Tip 5: Keep a spare charger in your bag for on-the-go charging solutions.
Pro Tips
Editor’s Choice

Cable Labels,300 PCS Waterproof Cable Tags in 10 Colors,Wire Labels for …
Common Mistakes to Avoid
Warning: Mistake 1: Overloading your power strip can lead to electrical hazards. Always check the wattage limits.
Mistake 2: Not labeling chargers can cause confusion and wasted time. Label each charger for easy identification.
Mistake 3: Forgetting to clean your charging station can lead to dust buildup, affecting device performance. Regularly wipe down the area.
Common Mistakes to Avoid
Editor’s Choice
6Ft Power Strip Surge Protector – Yintar Extension Cord with 6 AC Outlet…

MagicFiber Microfiber Cleaning Cloth, 6 Pack – Premium Cloth for Glasses…

LetraTag LT-100H Handheld Aesthetic Label Maker, ABC Keyboard Label Prin…
Troubleshooting Section
Problem: Devices not charging.
Solution: Check connections and ensure chargers are plugged in correctly.
Problem: Cables getting tangled.
Solution: Use cable clips to secure them and prevent tangling.
Problem: Power strip tripping.
Solution: Unplug some devices and check the wattage limit on the power strip.
Troubleshooting Section
Editor’s Choice

XHF 120 PCS Adhesive Cable Wire Clips Black, Outdoor Christmas Light Cli…
Anker Desktop Charger, 9-in-1 Power Strip with 300J Surge Protector, 5ft…
6Ft Power Strip Surge Protector – Yintar Extension Cord with 6 AC Outlet…
Variations/Alternative Methods
There are alternative ways to set up your charging station:
- Wall-mounted charging station: Good for saving desk space, ideal for small areas.
- Portable charging stations: Useful for taking your charging setup on the go.
Choose based on your space and device usage needs.
Variations/Alternative Methods
Editor’s Choice

USB Charging Station 50w10A 12 Ports Multiple Charging Block, USB C Stri…

Wall Mounted 8 Port Charging Station with Fast Charigng Cables – Multi…

8-Port USB Charger, Multi-Port Travel USB C Charger, Mini Charging Stati…
FAQs
What if I don’t have a power strip? You can charge devices directly from an outlet, but a power strip is more convenient for multiple devices.
How long should I charge my devices? Follow manufacturer recommendations; generally, overnight charging is safe for most devices.
Is it safe to leave devices charging overnight? Yes, most modern devices have built-in mechanisms to prevent overcharging.
FAQs
Editor’s Choice

Power Strip, SUPERDANNY Surge Protector with 22 AC Outlets and 6 USB Cha…
Conclusion
Congratulations! You have successfully set up a charging station for your desk devices. Not only does this enhance your workspace, but it also ensures your devices are always ready when you need them.
Now that your charging station is complete, consider exploring ways to further improve your workspace. Whether it’s adding more organization tools or personalizing your space, the possibilities are endless. Keep your devices charged and enjoy a more productive environment!