Creating your own desk can be a rewarding experience, but many beginners make crucial mistakes that can lead to frustration and wasted materials. These DIY desk mistakes can cost you time and money, making the project feel more like a chore than a fun venture. If you want to build a desk that not only looks good but also stands the test of time, it’s essential to recognize and avoid these common pitfalls.
In this guide, you’ll learn to identify six common mistakes and how to expertly sidestep them. By the end, you will be equipped with the knowledge to create a beautiful, functional desk that meets all your needs. Whether you’re working from home or crafting a study space, this guide will ensure your DIY project is a success.
This guide is designed for beginners and will take approximately 2-3 hours to complete. You’ll learn about planning, material selection, assembly, and finishing touches. So, grab your tools and let’s get started!
TL;DR Summary
- Avoid common mistakes like poor planning, incorrect measurements, and inadequate materials.
- Learn how to select the right materials and tools for your DIY desk project.
- Follow step-by-step instructions for successful assembly and finishing.
- Gain expert insights for a smoother DIY experience.
TL;DR Summary
Editor’s Choice

Digital Caliper Measuring Tool, Stainless Steel Vernier Caliper Digital …

Gorilla Ultimate Waterproof Wood Glue, Natural Wood Color, 8 Ounce (Pack…

BLACK+DECKER 20V MAX POWERCONNECT Power Drill Cordless Drill Driver Elec…
Prerequisites/Materials Needed
- Materials:
- Wood (e.g., plywood or hardwood)
- Wood screws (1.25-inch)
- Wood glue
- Sandpaper (medium and fine grit)
- Paint or wood stain
- Tools:
- Drill
- Screwdriver
- Measuring tape
- Cutting saw
- Clamps
Prerequisites/Materials Needed
Editor’s Choice

255-Piece Tool Set – Tool Kit with 12V Cordless Drill Driver, Toolbox St…

Furniture Repair Kit Wood Markers – Set of 13 – Markers and Wax Sticks w…

Heavy Duty Spring Clamps, 3.7 Inch Small Heavy Duty Clip with 1.6 Inch J…
Skill Level & Time Estimate
Skill Level: beginner
Total time estimate: 2-3 hours
Breakdown of time:
- Planning and measuring: 30 minutes
- Cutting and assembling: 1.5 hours
- Finishing touches: 30 minutes
Skill Level & Time Estimate
Editor’s Choice
DWIL Wood Stain and Sealer in One, Water Based Semi-Transparent Outdoor …

RUITOOL Japanese Hand Saw 6 Inch Double Edge Sided Pull Saw Ryoba SK5 Fl…

Digital Caliper, Sangabery 0-6 inches Caliper with Large LCD Screen, Aut…
Step 1: Plan Your Desk Design
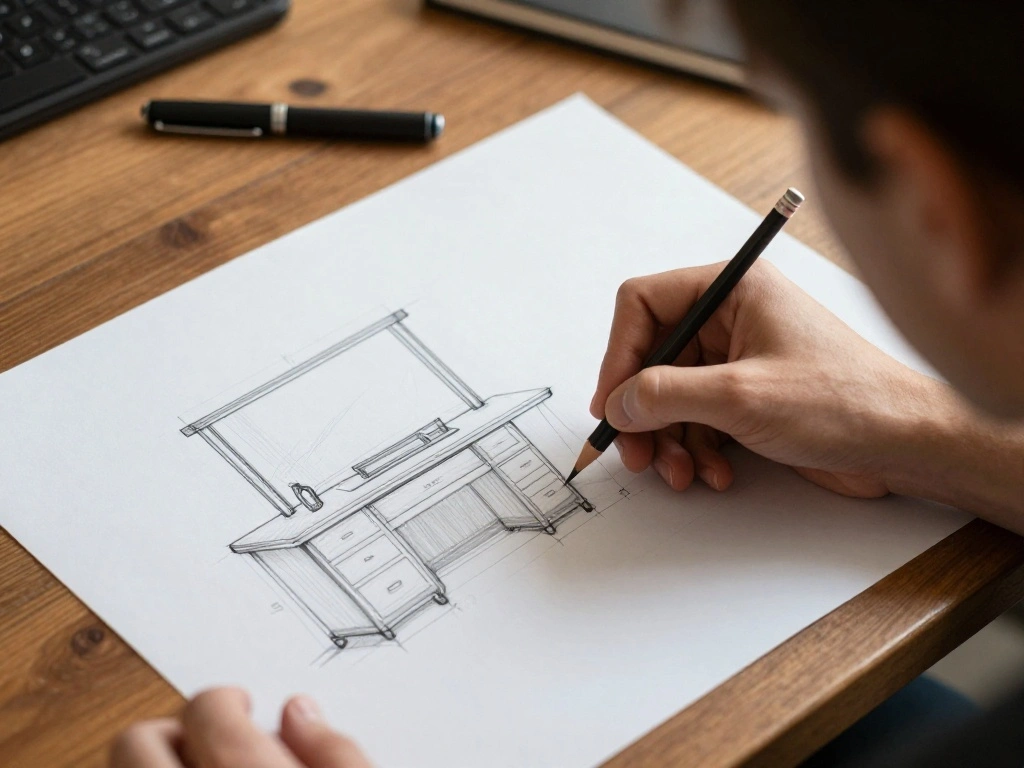
Start by sketching a simple design of your desk. This allows you to visualize dimensions and functionality. Follow these sub-steps:
- Decide on the desk height (standard is 28-30 inches).
- Determine the width and depth based on your workspace.
- Consider features like drawers or shelves.
Pro Tip: Use graph paper to maintain scale accuracy. Warning: Failing to plan can lead to mistakes in measurements, resulting in wasted materials. Spend 20-30 minutes on this step to ensure clarity.
Step 1: Plan Your Desk Design
Editor’s Choice

Zaviko Graph Paper Pad 8.5 x 11, 2 Pack, 4×4 Graph Ruled, Grid Paper Pad…

ErGear Electric Standing Desk Legs, 4 Memory Height Settings Height Adju…

Table Setup Blocks for Woodworking, 14pcs Aluminum Alloy Precision Set u…
Step 2: Gather Your Materials

Once you have a clear plan, gather all the necessary materials. This step is crucial to avoid interruptions during the build. Follow these sub-steps:
- Visit your local hardware store to purchase wood and other materials.
- Check that you have all tools ready and functional.
- Ensure that you have enough screws and glue.
Pro Tip: Purchase extra wood in case of mistakes. Warning: Incomplete materials can stall your project. Spend about 30-40 minutes collecting everything.
Step 2: Gather Your Materials
Editor’s Choice

Stanley FA190P Subfloor Adhesive Kit (12×24 Oz) – Polyurethane Expandi…
Step 3: Measure and Cut the Wood
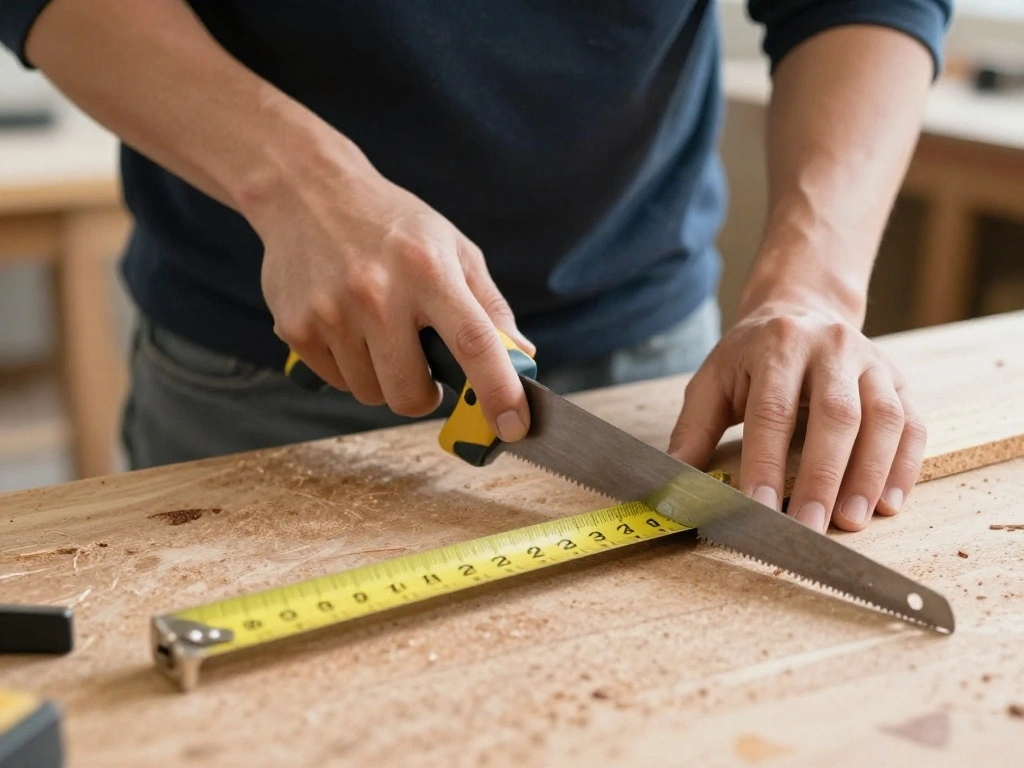
Accurate measurements and cuts are vital for a stable desk. Follow these sub-steps carefully:
- Use your measuring tape to mark the dimensions on the wood.
- Double-check measurements before cutting.
- Cut the wood using a saw, following your marked lines.
Pro Tip: Use clamps to hold the wood steady while cutting. Warning: Incorrect cuts can ruin your materials. Allocate about 1 hour for this step.
Step 3: Measure and Cut the Wood
Editor’s Choice
RUITOOL Japanese Hand Saw 6 Inch Double Edge Sided Pull Saw Ryoba SK5 Fl…

HORUSDY 8-Pack Bar Clamps for Woodworking, 12″ and 6″ Bar Clamps, Wood W…

Digital Caliper Measuring Tool, Stainless Steel Vernier Caliper Digital …
Step 4: Assemble the Desk Frame

With your pieces cut, it’s time to assemble the frame. Follow these sub-steps:
- Lay out the pieces according to your design.
- Use wood glue and screws to attach the legs to the top surface.
- Allow the glue to dry before moving on.
Pro Tip: Use clamps to secure connections while the glue dries. Warning: Skipping the drying time can weaken connections. This step will take about 40-50 minutes.
Step 4: Assemble the Desk Frame
Editor’s Choice

CRAFTSMAN Screwdriver Set, Bi-Material, 8 Piece Set (CMHT65075N)
Step 5: Sand and Prepare for Finishing
Before applying any paint or stain, prepare your desk’s surface. Follow these sub-steps:
- Use medium-grit sandpaper to smooth rough edges.
- Switch to fine-grit sandpaper for a polished finish.
- Clean the surface to remove dust from sanding.
Pro Tip: Sand in the direction of the wood grain for best results. Warning: Neglecting to sand can lead to an uneven finish. This process will take about 30-40 minutes.
Step 5: Sand and Prepare for Finishing
Editor’s Choice

JET 16″ Ready-to-Wrap Sandpaper, 220 Grit (60-6220)
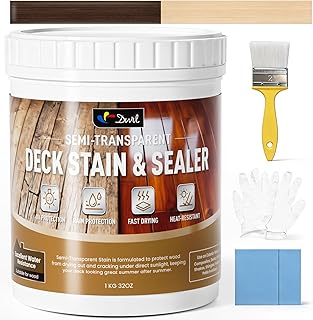
Step 6: Apply Paint or Stain

Now, it’s time to give your desk a finished look. Follow these sub-steps:
- Choose a paint or stain that fits your style.
- Apply the first coat evenly using a brush or cloth.
- Allow it to dry completely before applying a second coat.
Pro Tip: Test a small area first to ensure you like the color. Warning: Rushing can lead to streaks or uneven color. Allocate around 30-60 minutes for this step, including drying time.
Step 6: Apply Paint or Stain
Editor’s Choice

Trimaco 10102 SuperTuff Sponge, 2 Pack Staining Pad

Master Flame Class A Fire Retardant Spray for Wood, Fabric, Cotton & Mor…
Step 7: Final Assembly and Clean Up

Once your finish is dry, complete the assembly and clean your workspace. Follow these sub-steps:
- Reattach any components like drawers or shelves.
- Wipe down the desk to remove any dust or fingerprints.
- Organize and clean up your workspace.
Pro Tip: Use a natural cleaner for a fresh scent. Warning: Leaving your workspace messy can lead to accidents. This step should take about 30 minutes.
Pro Tips
- Measure Twice, Cut Once: Always double-check your measurements to avoid mistakes.
- Use Quality Materials: Invest in good wood and tools for a durable desk.
- Keep Your Workspace Organized: A clean area prevents accidents and keeps you focused.
- Allow for Drying Time: Don’t rush; let glue and paint dry properly for the best results.
- Personalize Your Desk: Add your unique touch with decals or custom colors.
Pro Tips
Editor’s Choice

Titebond Original Wood Glue 5063, Industry Standard for Woodworking, Fur…

CRAFTSMAN 25-Ft Tape Measure with Fraction Markings, Retractable, Self-L…

Raaco Steel Storage Cabinet, Standard 30-Drawer, Clear Polypropylene Pla…
Common Mistakes to Avoid
Warning: Skipping the planning phase can lead to a poorly designed desk. Always sketch your design first.
Warning: Incorrect measurements will ruin your project. Always measure twice before cutting.
Warning: Using low-quality materials can result in a flimsy desk. Invest in good wood and hardware.
Warning: Rushing through assembly can weaken joints. Take your time and ensure everything is secure.
Warning: Neglecting to sand can lead to a rough finish. Always sand your desk for a polished look.
Troubleshooting Section
Problem: Uneven legs on the desk.
Solution: Adjust the legs using a level to ensure stability. If necessary, trim the longer leg.
Problem: Paint or stain looks uneven.
Solution: Sand the surface lightly and apply another coat for an even finish.
Problem: Desk is wobbling.
Solution: Check all screws and connections; tighten any loose parts.
Problem: Difficulty in opening drawers.
Solution: Ensure the drawer slides are properly installed and lubricate if necessary.
Problem: Glue not holding.
Solution: Ensure you allowed enough drying time and use clamps for better adhesion.
Troubleshooting Section
Editor’s Choice

JOREST 40Pcs Small Precision Screwdriver Set with Torx Triwing Phillips,…

Heavy Duty Leveling Screw Leg,Leg Leveler 3.14″ Dia Base,Adjustable Leve…

SKIL 5” Random Orbital Sander with Cyclonic Dust Box & 3pc Sanding She…
Variations/Alternative Methods
- Use a Pre-Made Desk Kit: Great for beginners who want a quicker option. Pros: Less time-consuming. Cons: Less customization.
- Upcycling Materials: Create a desk from old furniture. Pros: Eco-friendly. Cons: Requires creativity and additional tools.
- Adjustable Height Desks: Build a desk with adjustable legs. Pros: Ergonomic benefits. Cons: More complex assembly.
Variations/Alternative Methods
Editor’s Choice

ErGear Electric Standing Desk Legs, 4 Memory Height Settings Height Adju…

Cabinet Hardware Jig, Punch Locator Drill Guide,Wood Drilling Dowelling …

VIVO Premium Electric 4-Leg Quad Motor Standing Desk Frame for 71 x 30 i…
FAQs
What if I don’t have the right tools? Consider borrowing or renting tools from a local hardware store, or ask friends for help.
How long should I wait for the glue to dry? Typically, wait at least 30 minutes, but check the glue instructions for specifics.
Is it safe to use power tools? Yes, as long as you follow safety guidelines and wear protective gear like goggles.
What if I make a mistake while cutting? Measure and cut a new piece of wood, or use wood filler if the mistake is minor.
Can I modify my design later? Yes, but keep in mind that changes may affect the overall stability and look of the desk.
FAQs
Editor’s Choice

Gorilla Wood Glue, 8 oz., Water Resistant PVA Wood Glue for Indoor & Out…

3M Chemical Splash Goggles, Impact Resistant, 99.9% UV Block, Scratch Re…

Metabo HPT 18V MultiVolt Cordless Brushless Driver Drill & Impact Driver…
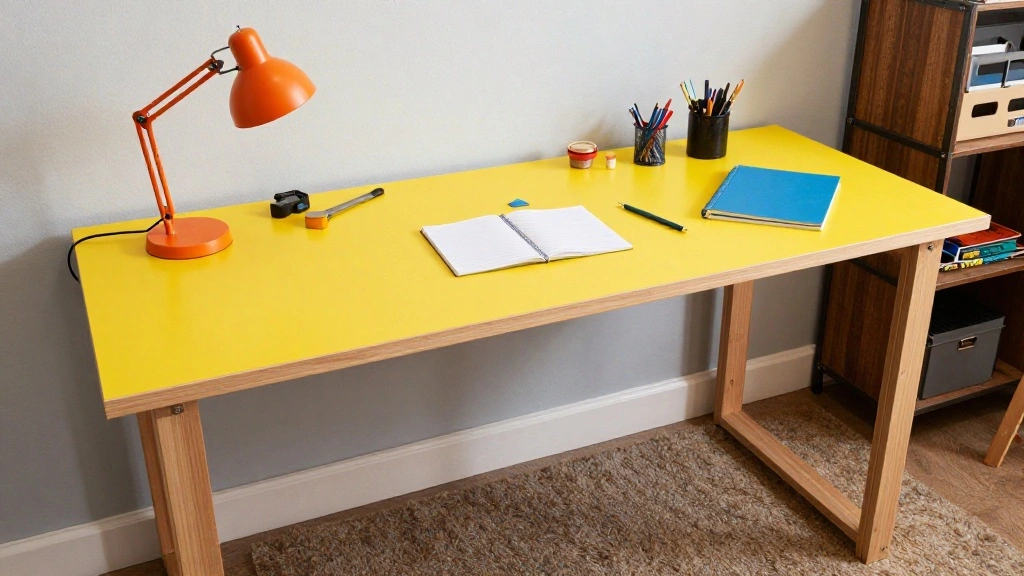
Conclusion

Congratulations! You’ve successfully navigated the DIY desk-making process and avoided common beginner mistakes. Take a moment to admire your hard work and the beautiful desk you’ve created.
Now that your desk is complete, consider adding personal touches like decorative items or organizing solutions to enhance your workspace. For future projects, remember these tips to make your next DIY venture even smoother. Happy crafting!