
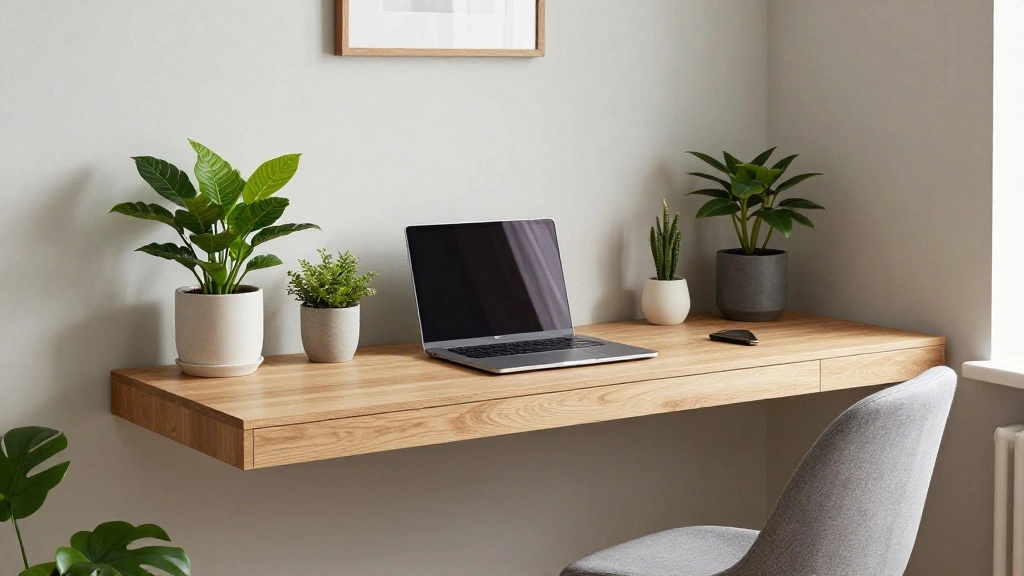
In today’s fast-paced world, having a dedicated workspace at home is essential for productivity. Yet, many people struggle to find a suitable area to set up a desk, especially in smaller living spaces. A floating desk nook in a corner can be the perfect solution, utilizing often-overlooked areas of your home. This guide will walk you through the process of creating a stylish and functional workspace that enhances your living space.
By the end of this guide, you will have a custom floating desk nook that maximizes your corner space while providing an inviting workspace for study or work. You will learn how to measure, cut, and install your floating desk, as well as how to accessorize it for optimal functionality.
This project is rated as intermediate in difficulty and will take approximately 2-3 hours to complete, depending on your skill level and the tools at your disposal. Prepare to transform an empty corner into a productive oasis!
TL;DR Summary
- Learn how to create a functional floating desk nook in a corner of your home.
- Estimate 2-3 hours for an intermediate-level project.
- Gather necessary materials beforehand for a smoother process.
- Follow step-by-step instructions to ensure a successful build.
TL;DR Summary
Editor’s Choice

KURUI Drywall Anchors and Screws Assortment Kit 270PCS, 135 Plastic Dry …

Surface Mount Corner Brackets Mount Table Apron Corner Brackets for Desk…

Pmnianhua 70” Floating Desk with Storage Shelves,Wall Mounted Desk Lapt…
Prerequisites/Materials Needed
- Tools:
- Drill
- Saw (circular or jigsaw)
- Measuring tape
- Level
- Stud finder
- Materials:
- Wood board (size based on desired desk size, e.g., 48″ x 24″)
- Floating brackets (2-3 depending on the length of the desk)
- Wood screws (appropriate size for the brackets)
- Paint or wood finish (optional)
- Sandpaper (medium and fine grit)
- Safety Gear:
- Safety goggles
- Dust mask
Prerequisites/Materials Needed
Editor’s Choice

The Original Granite Bracket Heavy Duty American Made Steel A36 Cold Rol…

Wood Screws Assortment Kit, 168 PCS #6 Black Flat Head Phillips Self-Tap…
Skill Level & Time Estimate
Skill Level: intermediate
Total time estimate: 2-3 hours
Breakdown:
- Gather materials: 30 minutes
- Measure and cut wood: 1 hour
- Install brackets: 30 minutes
- Finish and clean up: 30 minutes
Skill Level & Time Estimate
Editor’s Choice

NEODROP 4-Pack 12 Inch Heavy Duty Shelf Brackets, Large Wall Bracket for…

36 Pack Basswood Sheets,12″x12″x1/8″ 3mm Basswood Plywood,Craft Wood,Unf…
Step 1: Measure Your Corner Space
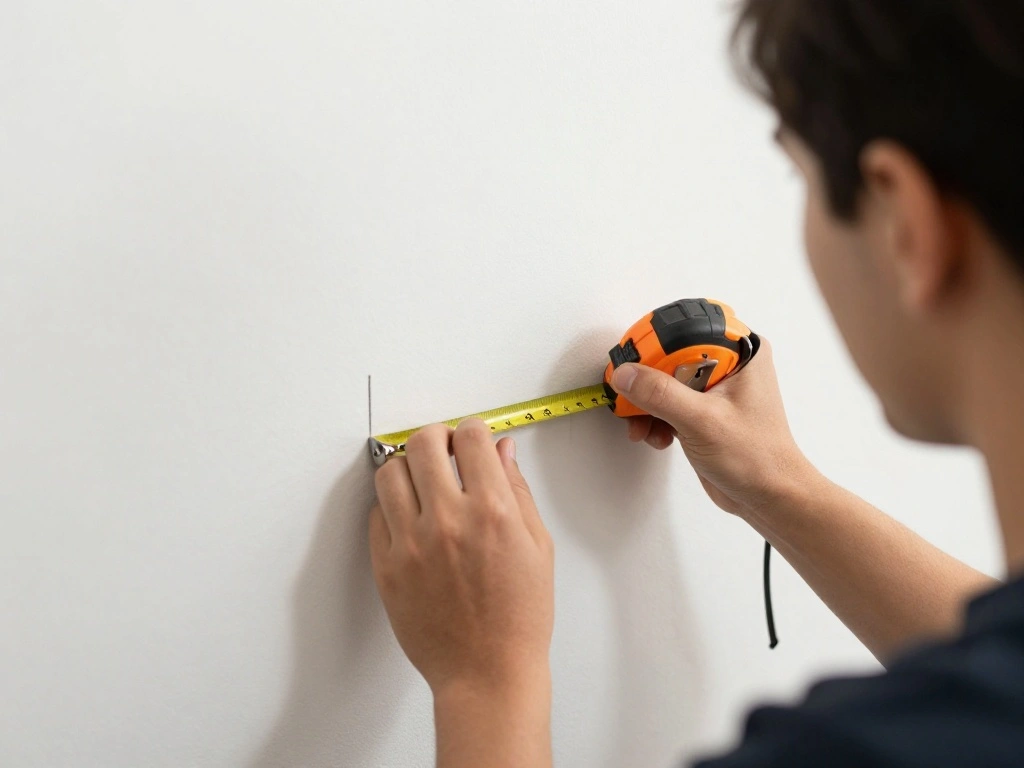
Begin by accurately measuring your corner space to determine the dimensions for your floating desk. Follow these sub-steps:
- Use a measuring tape to find the width and depth of the corner.
- Consider the height at which you want the desk to sit, typically around 28-30 inches from the floor.
- Mark the desired placement on the wall with a pencil.
Pro Tip: Ensure you account for any baseboards or obstructions that may affect the installation.
Why this matters: Accurate measurements will help ensure that your desk fits perfectly in the corner and is not too high or low for comfort.
Time estimate for this step: 20 minutes.
Step 1: Measure Your Corner Space
Editor’s Choice

2Pcs Heavy Duty Shelf Bracket Countertop Support Brackets 16″x12″ Wall M…

CrimsonMark 120Pcs #8 Self Drilling Drywall Anchors and Screws kit #8 x …

CRAFTSMAN 25-Ft Tape Measure with Fraction Markings, Retractable, Self-L…
Step 2: Select and Cut Your Wood
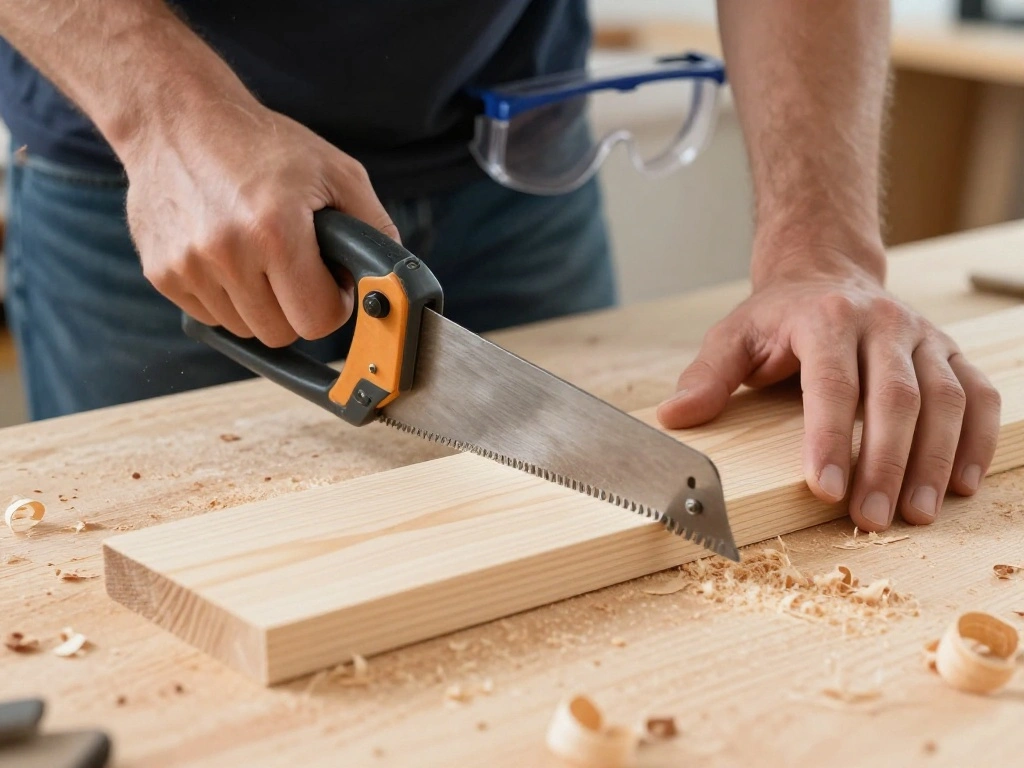
Once you have your measurements, select the wood board for your desk. Follow these steps:
- Choose a sturdy wood board that fits your measurements. A thickness of at least 1 inch is recommended for durability.
- Use the saw to cut the board to the desired size based on your measurements.
- Sand the edges and surface of the board using medium and fine grit sandpaper for a smooth finish.
Pro Tip: Consider using a hardwood like oak or maple for a more durable desk.
Why this matters: Properly selecting and cutting the wood ensures that your desk is not only functional but also visually appealing.
Time estimate for this step: 45 minutes.
Step 2: Select and Cut Your Wood
Editor’s Choice

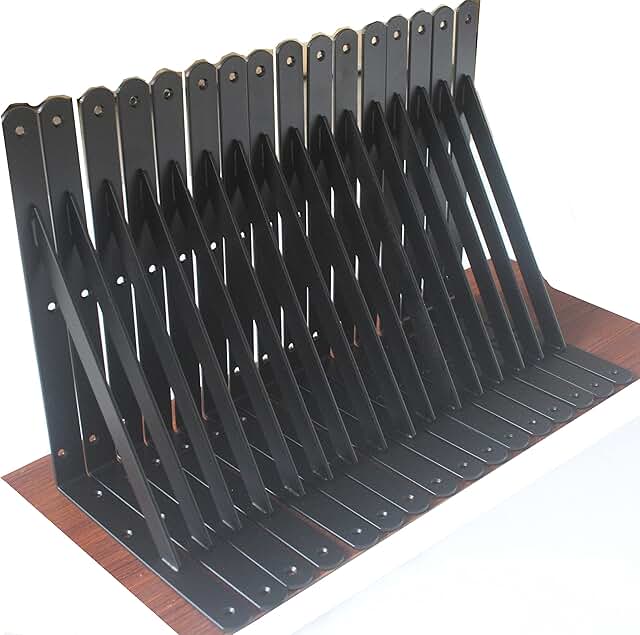
Step 3: Install Floating Brackets
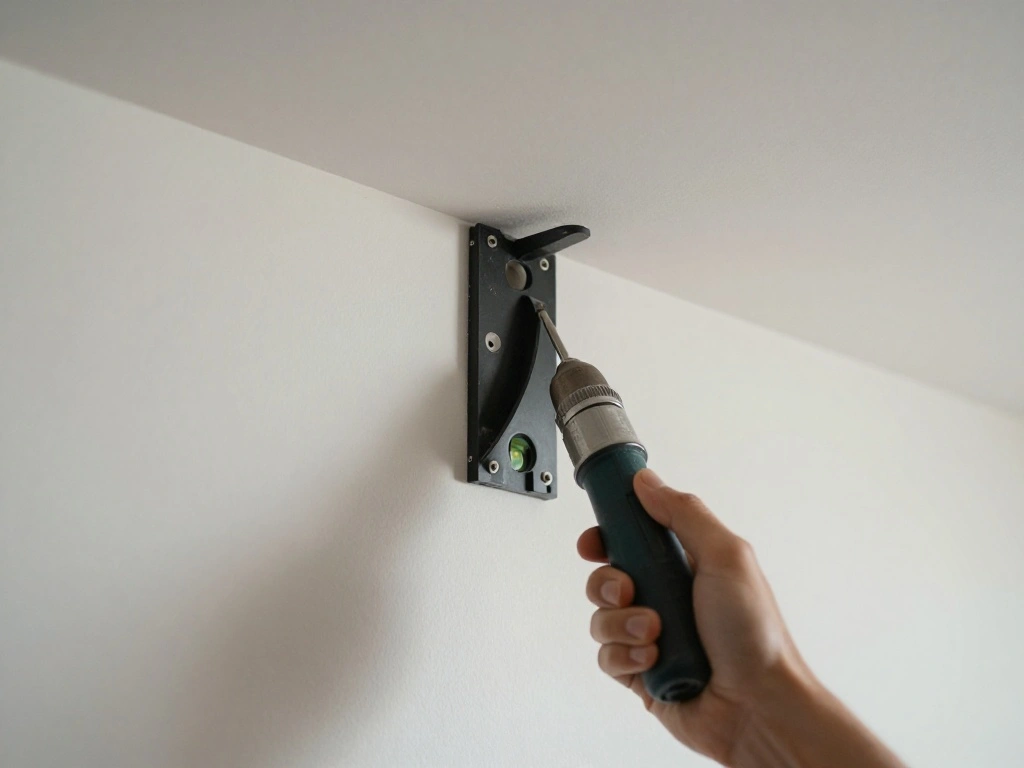
Next, it’s time to install the floating brackets that will support your desk. Follow these steps:
- Use a stud finder to locate studs in the wall where you will install the brackets.
- Mark the bracket positions on the wall based on your desk height, ensuring they are level.
- Drill holes into the wall and attach the brackets using wood screws.
Warning: Failing to install into studs can lead to a weak installation that may collapse.
Why this matters: Securely installing brackets is crucial for the stability and safety of your floating desk.
Time estimate for this step: 30 minutes.
Step 3: Install Floating Brackets
Editor’s Choice

Wood Screws Assortment Kit, FIXLINK 240 PCS High Hardness Flat Head Wood…

8PCS Magnetic Spirit Level Set 16/24/32/48 Inch Aluminum Alloy Bubble Le…

Stud Finder Wall Scanner – 5 in 1 Stud Finder Tool w/Smart Chip and HD L…
Step 4: Attach the Desk to the Brackets
With the brackets securely installed, you can now attach the desk. Follow these steps:
- Lift the wooden board and place it onto the installed brackets.
- Ensure the board is level and adjust if necessary.
- Secure the board to the brackets using screws provided with the bracket kit.
Pro Tip: Use a level tool to double-check that the desk is perfectly horizontal before securing it.
Why this matters: Proper attachment ensures that your desk remains stable and functional over time.
Time estimate for this step: 20 minutes.
Step 4: Attach the Desk to the Brackets
Editor’s Choice

Torpedo Level Magnetic, Firecore 9 Inch Shockproof Small Leveler Tool wi…

CRAFTSMAN Screwdriver Set, Bi-Material, 8 Piece Set (CMHT65075N)

Folding Shelf Brackets – 16 Inch 2 Pcs Heavy Duty Stainless Steel Collap…
Step 5: Finish the Desk Surface
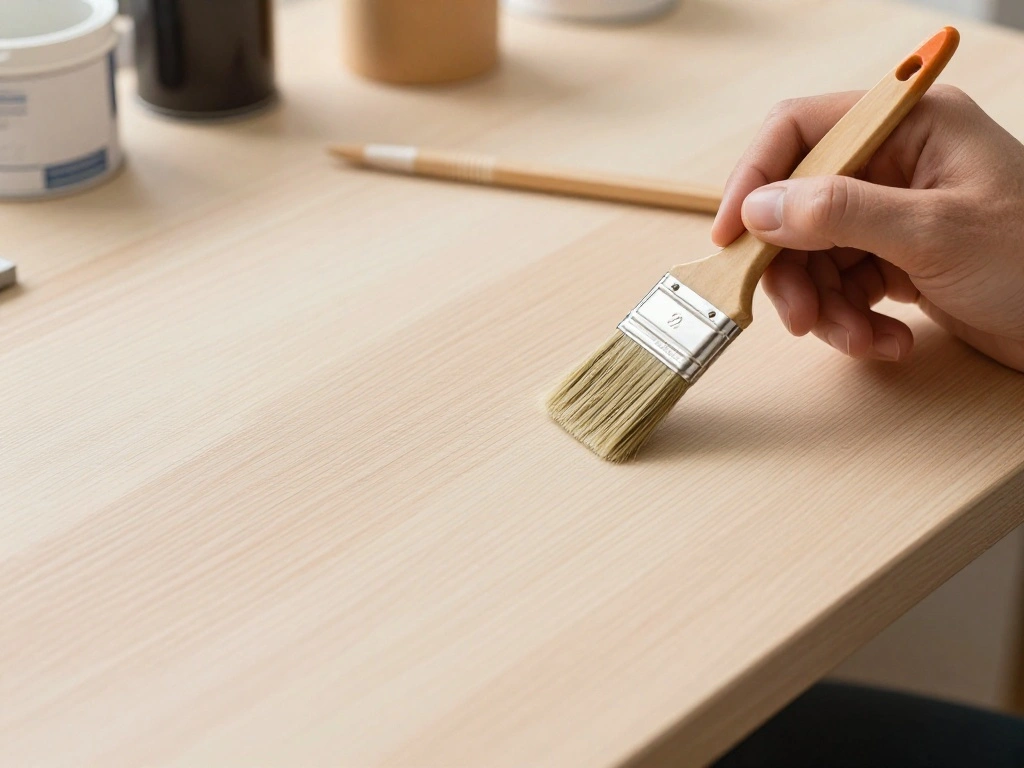
To enhance your desk’s appearance and durability, it’s time to finish the surface. Follow these steps:
- Apply the wood finish or paint of your choice using a paintbrush or roller.
- Allow the finish to dry according to the manufacturer’s instructions.
- If desired, apply a second coat for better coverage.
Pro Tip: Use a water-based finish for easy cleanup and low odor.
Why this matters: A good finish protects the wood and adds aesthetic appeal to your new desk.
Time estimate for this step: 30 minutes.
Step 5: Finish the Desk Surface
Editor’s Choice

Minwax 233334444 Polycrylic Protective Wood Finish, Clear Satin, ½ Pint

6pcs Wood Grain Tool Set – 7 Inch Rubber Paint Rollers for Realistic Woo…

Paint Brushes Set of 24 Pieces Wooden Handles Brushes with Canvas Brush …
Step 6: Accessorize Your Desk Nook
Now that your floating desk is installed and finished, it’s time to accessorize. Follow these steps:
- Add a comfortable chair that fits the height of your desk.
- Include organizational items like shelves, plants, or desk organizers to personalize your space.
- Plug in your computer or other devices and set up your workspace.
Pro Tip: Personal touches like artwork or inspiring quotes can enhance your productivity.Why this matters: A well-decorated workspace can boost creativity and make you feel more at home.
Time estimate for this step: 30 minutes.
Step 6: Accessorize Your Desk Nook
Editor’s Choice

gianotter Desk Organizers and Accessories, Monitor Stand with Drawer and…

Bamworld Plant Stand Indoor Plant Shelf Outdoor Wood Plant Rack for Mult…

TRALT Office Chair Ergonomic Desk Chair, 330 LBS Home Mesh Office Desk C…
Pro Tips
- Choose the Right Height: Ensure your desk height is comfortable for long hours of work.
- Lighting Matters: Position your desk near a window or add task lighting for better visibility.
- Consider Cable Management: Use cable clips or sleeves to keep cords organized and out of sight.
- Use Multi-Functional Furniture: Choose a chair that can double as guest seating or storage.
- Stay Organized: Regularly declutter your workspace to maintain productivity.
Common Mistakes to Avoid
Warning: Not measuring accurately can result in a desk that doesn’t fit. Always double-check your dimensions before cutting.
Warning: Skipping the studs when installing brackets can lead to a collapsed desk. Always use a stud finder.
Warning: Using the wrong size screws may weaken your installation. Match the screws to the bracket specifications.
Warning: Forgetting to sand the wood can lead to splinters. Always finish edges and surfaces.
Warning: Rushing the finish can ruin the look. Allow ample drying time between coats.
Common Mistakes to Avoid
Editor’s Choice

JEGONFRI High Hardness Wood Screws Assortment Kit, 209 pcs, Phillips Dri…
Troubleshooting Section
Problem: The desk feels wobbly.
Solution: Check if the brackets are securely attached to the studs and tighten screws if necessary.
Problem: The desk is not level.
Solution: Use a level tool to check, adjust brackets or desk as needed.
Problem: Finish isn’t drying.
Solution: Ensure the area is well-ventilated, and check for humidity issues.
Problem: Saw cuts are rough.
Solution: Sand the edges to smooth them out.
Problem: Brackets don’t support the weight.
Solution: Ensure they are installed correctly into studs and consider adding additional brackets if necessary.
Troubleshooting Section
Editor’s Choice
Torpedo Level Magnetic, Firecore 9 Inch Shockproof Small Leveler Tool wi…

VEVOR Air Mover Blower Fan 12 Inch, 3198CFM 585W with 16.4ft Flexible Du…

Stud Finder Wall Scanner Detector – 5 in 1 Electronic Wall Wood Metal St…
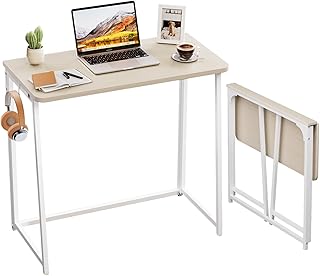
Variations/Alternative Methods
- Use a reclaimed wood board for a rustic look, which adds character to your space.
- Consider corner shelves instead of a desk for a minimalist approach, especially for small spaces.
- Install a foldable desk that can be tucked away when not in use, making it ideal for multifunctional rooms.
Variations/Alternative Methods
Editor’s Choice
WOHOMO Folding Desk, Small Foldable Desk 31.5″ for Small Spaces, Space S…

ROMGUAR CRAFT Corner Floating Shelves Wall Mounted Set of 4, Rustic Wood…
Rustic Farmhouse Wall Mounted Coat Rack – 24” Reclaimed Wood Board w…
FAQs
- What if I don’t have a stud finder? You can use a hammer to tap the wall; listen for changes in sound to find studs.
- How long should I wait for the finish to dry? Follow the manufacturer’s instructions; typically, it’s 2-4 hours for the first coat.
- Is it safe to mount a heavy computer on a floating desk? Yes, as long as the brackets are properly installed into studs and rated for the weight.
- What if my wall is not flat? Use shims to level the brackets during installation.
- Can I paint the desk after installation? Yes, but it’s easier to paint before attaching it to the brackets.
FAQs
Editor’s Choice
12 Pack L12 x H 8″ Black Heavy Duty Shelf Brackets with Screws Metal She…

Furniture Clinic Wood Varnish | Satin | Polyurethane Waterproof Coating …

Zircon® StudScout™ Magnetic Stud Finder Wall Scanner 2-Pack, Battery-…
Conclusion
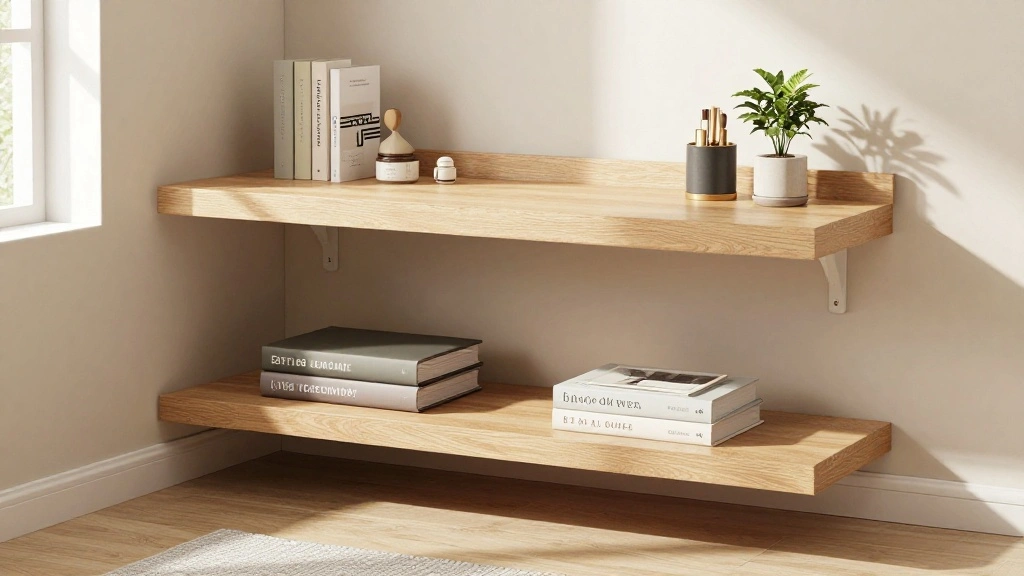
Congratulations on building your very own floating desk nook! You have transformed an empty corner into a functional workspace that reflects your style. Enjoy the productivity boost and aesthetic upgrade it brings to your home.
Now that your desk is complete, consider adding personal touches or additional storage solutions to enhance your workspace further. Explore ways to keep your area organized and inviting, ensuring it remains a place where you can thrive.